Oh my, I love basil. I love pesto. I love summer.
It’s only January and I’m already dreaming of summer. Caprese salad is my one of my favorite things to eat in the summer. Tomatoes are at their peak and fresh mozarella is always good. I love making caprese sandwich on good French bread or ciabatta. Love it, love it, love it.

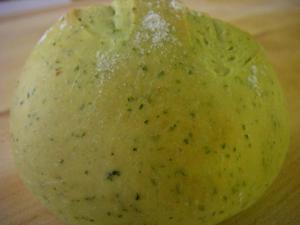
This week, I made Pesto Rolls from the Art & Soul of Baking. These rolls scream summer. They scream summer so loud that I actually went to the grocery store to look for a good tomato.

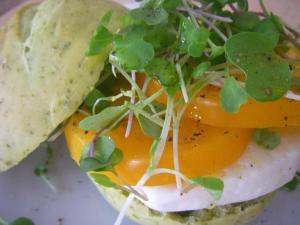
As you know, January isn’t the best time to buy tomatoes–I was desperate! I ended up buying a yellow tomato, because the red ones did not look like they had any flavor.

In addition to the tomato and fresh mozarella, I added organic micro greens, a drizzle of olive oil, and fresh ground pepper. Heaven!
PESTO ROLLS
From the Art & Soul of Baking
Makes 8 (4-ounce) rolls
- 2 cups loosely packed fresh basil leaves
- ¼ cup olive oil
- ¼ cup freshly grated
- Parmesan cheese
- 4 cloves garlic, thinly sliced
- ½ teaspoon plus 1½ teaspoons salt
- 1 cup (8 ounces) warm water (110° to 115°F)
- 1 tablespoon active dry yeast, or
- 2¼ teaspoons instant yeast
- 3¼ cups bread flour or unbleached all-purpose flour
- Make the pesto: Combine the basil, olive oil, Parmesan, garlic, and ½ teaspoon salt in the bowl of the food processor and process until very finely chopped and paste-like.
- Mix, rest, and knead the dough: Place the warm water in the bowl of the stand mixer and sprinkle the yeast over the top. By hand, whisk in ¼ cup of the flour. Let the mixture sit for 10 minutes, or until the yeast is activated and looks foamy. Add the pesto and whisk by hand until well blended. Add the remaining 3 cups flour and the 1½ teaspoons salt. Attach the dough hook and blend on low until the dough begins to come together and form a cohesive mass, about 2 to 3 minutes. Cover the bowl with plastic wrap or a damp lint-free cotton towel and let the dough rest for 20 minutes to allow it to fully hydrate before further kneading. Scrape down the sides of the bowl and turn the dough over so everything gets mixed evenly. Knead on low speed until the dough is firm, elastic, and smooth, 3 to 6 minutes.
- Rise the dough (first rise) : Lightly oil the tub or bowl, scrape the dough into the tub, and brush the surface of the dough with a little oil. Cover tightly with plastic wrap and let the dough rise until doubled, about 1 hour (longer if the room is cold). If you are using a tub, be sure to mark the starting level of the dough with a pencil or piece of tape so it’s easy to tell when the dough has doubled.
- Punch down, divide, and shape the rolls: Turn the dough out onto a work surface. Press down on the dough firmly to expel some of the air bubbles, but don’t knead the dough again or it will be too springy and difficult to shape (if this happens, simply cover the dough with plastic wrap or a damp lint-free cotton towel and let it rest for 10 to 15 minutes to give the gluten some time to relax). Divide the dough into 8 equal pieces (about 3¾ ounces each) and shape each one into a taut, round ball according to the directions on page 69. Place the rolls on the prepared baking sheet about 3 inches apart.
- Proof the dough (second rise) : Cover the rolls loosely with plastic wrap or a damp lint-free cotton towel and let rise until almost doubled in size, 35 to 45 minutes. They should look like they took a deep breath and should pass the thumb test (page 70).
- Prepare the oven: Place a baking or pizza stone in the oven. Preheat the oven to 400°F. Be sure to allow 30 minutes to 1 hour for the stone to fully heat.
- Bake the rolls: Remove the plastic wrap or towel and dust the top of the rolls lightly with a sprinkling of flour—don’t go crazy here or you’ll have a mouthful of flour. Use the lame, razor, or the tip of a pair of kitchen scissors to make a decorative slash or two in the top of each roll. Immediately place the pan in the oven on the baking stone or baking sheet. Bake for 15 to 18 minutes, until cooked through and the internal temperature registers 200°F on an instant-read thermometer. Transfer to a cooling rack. Serve warm or at room temperature.


